KST Servo Programming Tool 1 - Button Interface V6 & V8 servos

Category: Digital Servos
Manufacturer: KST Servo
Manufacturer KST Servo
Our Price

89.00


73.55 Ex VAT

Seen it cheaper?

Availability
Low Stock
Ships same day if placed before 12H
SKU KST-6001
Quantity

Purchase this product now and earn 89 Points!


Description

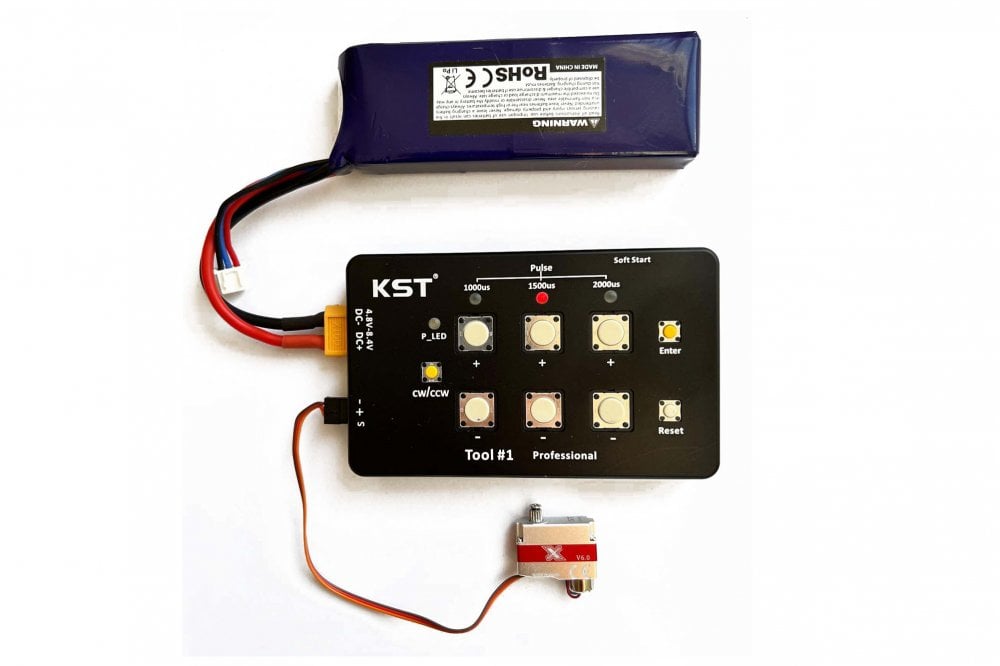
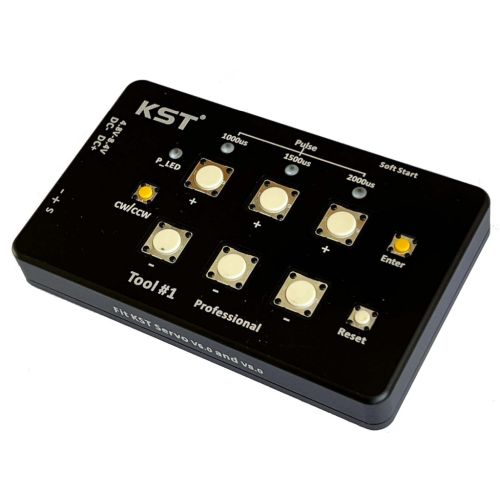
The KST Servo Programming Tool #1 is used for programming KST V6 and V8 servos without the need for a PC or other computer.

This tool has a simple press-button interface that allows the servo mid point and end points to be set. It also allows the direction of rotation to be reversed.

Tool #1 User Guide

1.1. When using with KST X08 and X10 servos power the Tool#1 using any 4.8V to 8.4V DC power source with an XT60 plug (eg a 2S LiPo battery). The exact same output voltage that is fed into the tool is output to the servo, so using a 3S or higher voltage LiPo will irretrievably damage any X08 or X10 servo. The tool DOES NOT regulate the voltage down to a safe level for the servo.

1.2. The voltage input needs to be set according to the working voltage range of different models of KST servos. Do not input high voltage at will. The correct voltage must be used in order not to burn the servo out. For example: if programming a KST X08 V6 servo, the working voltage range is 3.8V – 8.4V, so the input voltage range must be 4.8V-8.4V DC. Alternatively if programming a KST X20-12-M 835-1 servo the working voltage range is 9-13V, so the input voltage range must be 8.4V DC.

2. Output interface: There are two rows of contacts, for programming one servo. The second row is spare. To connect the servo, orient the servo plug so the orange wire is aligned to the "S" mark, and the brown wire to the "-" mark.
-- = servo negative = brown
+ = servo positive = red
S = servo PWM signal = orange

3. Power-on and setting operation steps

3.1. Connect the power supply. After power-on, Tool#1 will enter the self-test. After the self-test is successfully completed, the buzzer will sound twice, and the orange power light of P_LED will blink. You can now connect the servo.

3.2. After checking the correct voltage connect the servo to the RC plug port. After connecting the servo the Tool#1 will automatically recognize this and output a 1500us PMW signal to command the servo to the midpoint location. At this time, the LED below 1500us will turn red and the Tool#1 enters the midpoint setting mode.

3.3. Midpoint setting: After entering the midpoint setting mode, press the "+" and "-" buttons below the 1500us label to set the required servo arm position for the midpoint PMW value, then press the Enter button to confirm. After the confirmation is successful, the buzzer will sound once. This indicates that the midpoint setting is completed and the Tool#1 enters the left and right stroke setting mode.

3.4. Left and right stroke setting: Press the "+" and "-" buttons below the 1000us label to set the max output arm movement in the low PMW signal direction. Then press the "+" and "-" buttons below the 2000us label to set max movement in the other direction. Then press the Enter key to send this info to the servo. The buzzer will sound once to indicate that the left and right stroke setting has been successfully made. The orange power light of P_LED will also start flashing, indicating that all operations have been completed and Tool#1 will enter waiting state, ready for another servo to be connected.

3.5. To only set the servo midpoint position, enter the midpoint setting mode and press the Enter button twice after the setting is complete. To only set the left and right movements, after entering the midpoint setting mode, press the Enter button once to enter the left and right stroke setting mode. After the setting is completed, press the Enter button to complete the servo setup.

4. Use of "CW/CCW" button

4.1. CW = clockwise; CCW = counter-clockwise.

4.2. After entering the left and right stroke setting mode, press the "CW/CCW" button to reverse the servo rotation for a given change of input signal. Then press the Enter key to confirm.

5. The Reset button. The Reset button only resets the Tool#1, and does not reset the connected servo.

Need Some Advice?

Complete the form below and we'll get back to you...


We'll never share your email with anyone else.

Seen it cheaper than €89.00 ?

Complete the form below and we may be able to match, or even beat the price...


We'll never share your email with anyone else.
Must be a valid URL to the competitor's product page that displays the price
 
Terms & Conditions

Please do not send any messages trying to compare prices with unknown shops. We will only match with official shops located in Europe.

A store that has no physical shop, no showroom, no physical contact info, no return policy, including 'home garage shops' are NOT considered as an official store.

We are working hard to bring you low prices. But selling a product without warranty (after-sales service) is not our vision. Sometimes our support and advice is worth more important then the product itself.

To receive a price match, please read the conditions and make sure you qualify for a price match and then submit a request using the price match form on the product page.

Conditions:

  • Price matches are honored on identical items only. Same brand, same tech specs, same warranty conditions. *
  • The item must be brand new, make sure the company you want to match has the product IN STOCK!
  • We only price match with official stores within the EU and the products have to come from official importer/producer in Europe.
  • The competitor must be a physical and authorized dealer of the item you wish to purchase.
  • Special sales or events cant be covered with price match policy.
  • If you happen to find a lower price (please check shipping costs!) on an identical item, just show us the price (including delivery costs).
  • Sometimes due the Prices updates some companies showing old -not updated prices. be aware about this

* Some products within EU have different sockets, example UK chargers which do not fit in Europe.

How to Apply:

Simply fill a price match request online at the time of order by including the competitor's URL for the item in the comments section of your order form.

This is an individual response, We will acknowledge your request within 24-48h and provide instructions for next steps.

Please note this is a manual process and you will not be able to physically adjust the price on your on-line order.

If you need a more immediate response, please call +32 486 808080.

Remarks:

Our price match does not apply to competitor's bonus offers, free offers, auction websites, non-retail (wholesale) websites, private sales, special orders, typographical errors, clearance sales, liquidation sales, mail-in rebate offers, or where a service commitment is included in the transaction.

Internet competitor offers must include shipping and handling charges as the basis for comparison.

Certain UK products are not covered by European warranty. Check with us for compatibility issues.

Price matching is subject to providing proof of the manufacturer's part number and availability of the product. (i.e. current dated advertisement, register receipt, copy of webpage or catalog page) of a lower price.

Please consider the price matching as an action of good will, we reserve the right to refuse any request.

These terms and conditions may change at any time without notice.